


I've been really into the shop organization mode here lately. I find it's a lot more fun to work in my shop when everything is neat and organized instead of searching for the things I need for half an hour. The plan was to build some sort of organizer to house my sander and all the sand paper that goes with it. I also wanted plenty of room for expansion in case I buy more sand paper of different grits in the future.
The overall dimensions for the box were 26" tall by 6 1/2" wide and 6" deep. The bottom shelf is mounted 1/2 " from the bottom and the top shelf is about 5 1/2" from the top with all the space in between for the sand paper dividers. I spaced the dividers for the sand paper about every 2.5 inches or so, you can space them however far apart you need or want them to be.
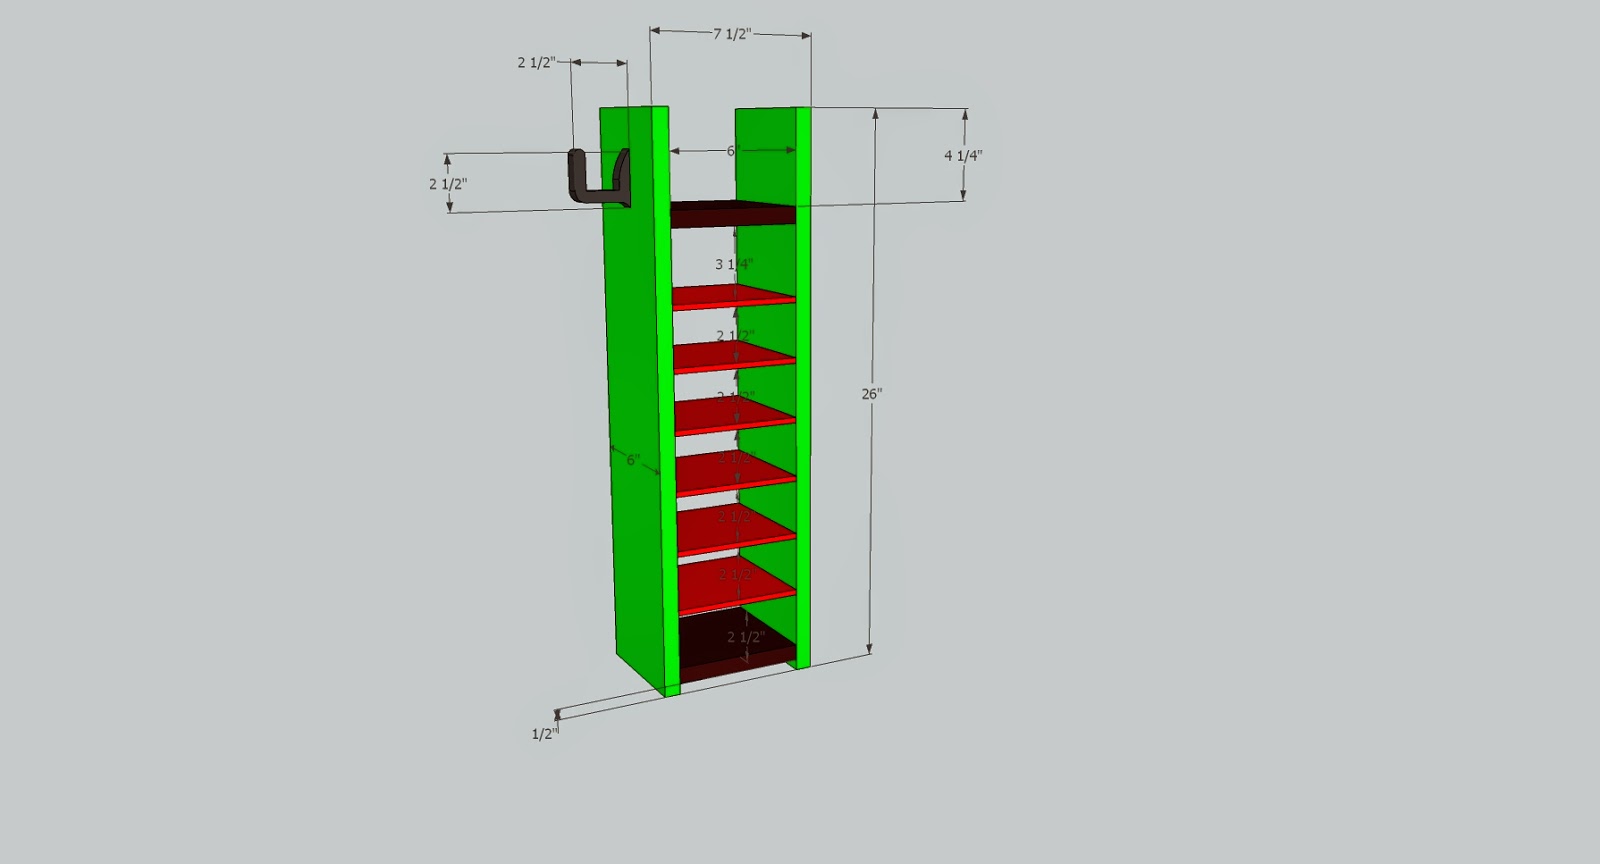
I started by cutting the piece for the two sides to the height I wanted the sides to be. I went ahead and cut all the dados while it was still in one piece before splitting into the two sides. This helps by making sure your dados will line up and making less passes on the saw making the dados. You could also use pocket hole joinery to build the cabinet if you like.


Once I had all my dados cut for the shelves I switched back to my regular blade and cut the side into two pieces and while I already had the fence set I cut the 1/4" ply to depth and then reset the fence to cut the width on all the pieces, make sure to take into account the depth of the dados if your using this method of joinery. I cut the back last making sure to take into account the depth of the dados when setting the fence for the width.


I drilled pocket holes in the top shelf before gluing to aid in attaching the cleat to the back of the cabinet. Then glued all the shelves in place and clamped everything together. Once the glue dried I removed clamps and attached the back with a little glue and some brad nails. Next I went ahead pre-drilled two more holes into the back of the cleat to screw into the two sides.


The top shelf was designed to hold the orbital sander and I decided I wanted to make some sort of holder to hang the power cord from. I grabbed a scrap piece of 3/4" pine I had lying around and sketched out the design. I used my band saw to cut it into rough shape and used my new spindle sander to smooth out the saw marks. This was my first time using the new sander and I really enjoyed using it. It should make life much easier as far as sanding goes anyways.


Here is the final product, I was very pleased with the outcome and now have a good way to organize my sanding stuff.


Below is the YouTube video for this project if you would like to see this and other projects be sure to subscribe to my YouTube Channel, I post videos there ever Saturday. Click here to download the plans for this project: French Cleat Sanding Station


