


I've been wanting to build this coat rack for a while now and when my three year old little girl ripped the cheap one we had out of the wall I knew it was time. In all her excitement to get her favorite mickey coat (so she could help let the dog out), she tugged and pulled on it until the wimpy drywall anchors could hold no more.

Here is the culprit, don't let the cute face fool you, she's menacing, especially when you get in between her and Mickey Mouse.
I built this coat rack using just scraps of plywood and trim I had lying around the shop. I have a bad habit of hoarding leftover materials in my shop and figured it was time for a purge. There are lots of different ways you can customize this coat rack by changing up the trim and the shape of the corbels to your liking. You also don't have to use plywood to build it with, you can use any material you have around the shop or just buy some cheap pine from the home store.


The first thing I did was make the corbels. I glue laminated two pieces of 3/4" pine to give me 1 1/2 inches in thickness. Once the glue was dry, I unclamped the pieces and laid them on their sides. I sketched out a design I liked and then cut them out on the bandsaw. If you don't have a bandsaw or just don't feel comfortable making these you can either simplify them by just cutting an angle on them or buy some pre-made ones.

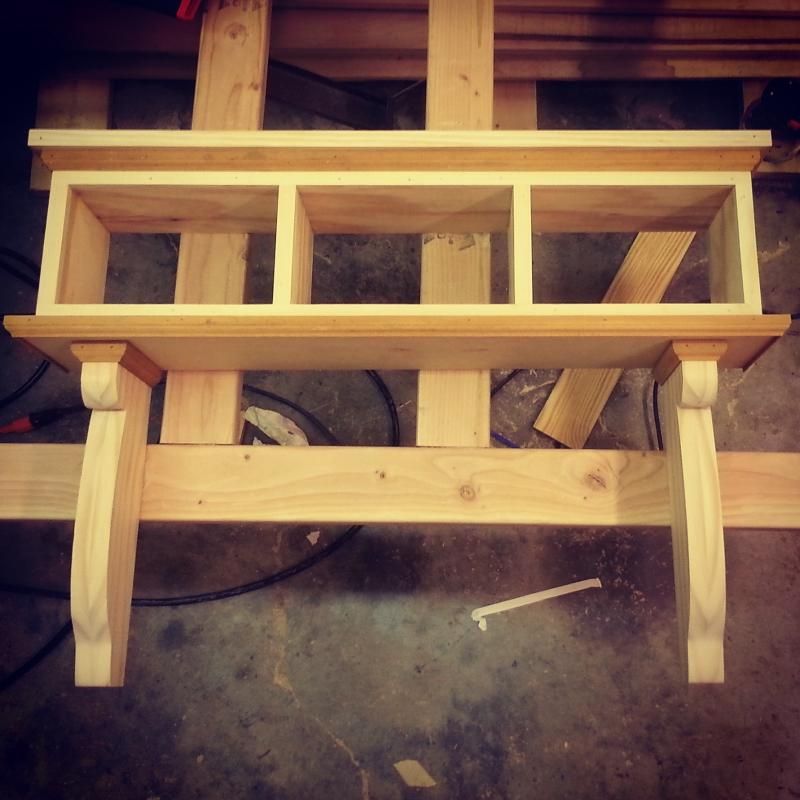
It was time to build the carcass. Again I just used materials I had lying around the shop so I adjusted the dimensions accordingly and you can do so as well depending on your needs and what you have available. I used all 3/4 inch material for this step. I used glue and brad nails to hold all the pieces in place and then went back and counter-sunk and screwed the pieces in place with 2 inch drywall screws. You could also use the Kreg jig here if you would like.

I cut this piece so that I would have a little bit of a reveal on the two sides and the front and just flushed it up to the back. I simply laminated this piece on with glue and lots of clamps. This helps cover up the screws on the bottom from the previous step.

I took this opportunity to attach the corbels before putting on the top. I counter sunk three 3 1/2" drywall screws into the bottom of the carcass and into the corbels, I would also suggest adding glue for extra strength. Since I was painting this project, I just went back later and filled the screw holes with drywall compound.

Now just add the top, and be glad you don't have to cuss because you forgot about mounting the corbels before installing the top haha.

I added this 3/4 inch piece flush around the top so that I could build the top up for added trim. I didn't even bother mitering the corners because I knew I would cover it up with trim anyways. I attached it with glue and brad nails.

The next piece of trim that I added was cut so that I would have 1/2 inch overhand on the sides and front. I did miter the corners on the top because I knew it would be visible, I attached with glue and brad nails.

Now its time to add the part to hang the coat hooks on. I used pocket screws on the backside to attach this board to the corbels.
Now to the fun part, adding the trim. There are lots of options here for trim for you to choose from or you may choose to not use any trim at all. I used what I had lying around and I can tell you it really made a difference in the overall appearance of the coat rack. I used brad nails and glue to attach the trim.
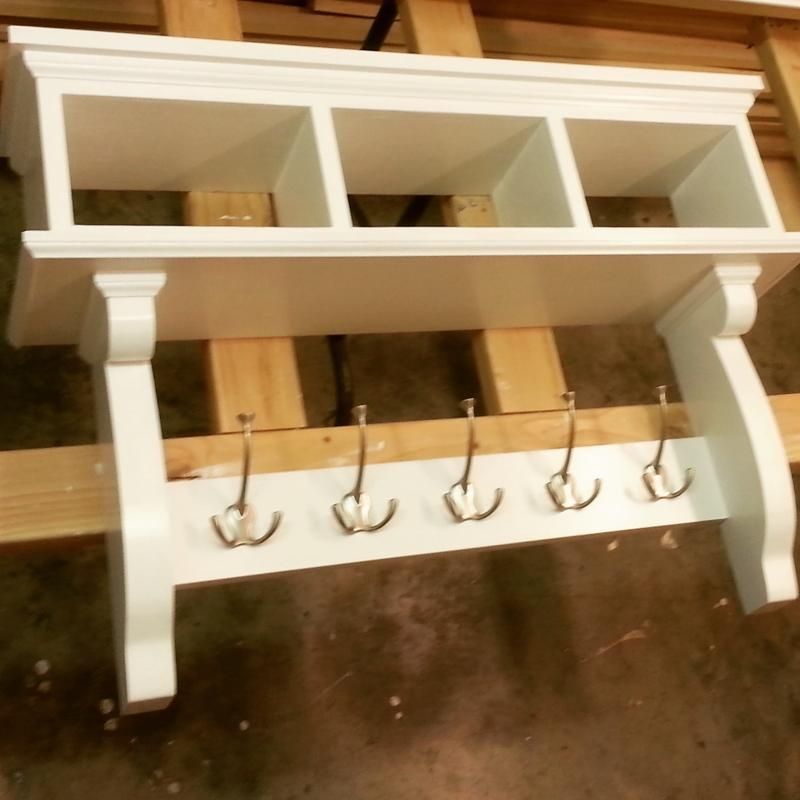

Now its time for finish sanding and attaching the coat hooks. I had the luxury of being able to use our prior coat rack as a template for the hooks and the hooks themselves. You can add as many hooks as you like here just make sure you evenly space them out on the board. I sanded the entire piece down with 180 grit paper and filled all the holes with regular drywall compound that you can get at any box store, it sands really easily and paints nicely. I painted it with two coats of primer, lightly sanding in between each coat with 220 grit paper. The primer helps for better adhesion and coverage of the top coat as well as highlights any imperfections you may have missed during the filling step. For the final step, I brushed on two coats of high gloss latex paint for nice shiny white finish.


The Best Online Casino Sites in India | LuckyClub
ReplyDeleteLuckyclub is a new online casino and betting site that was launched in 2016 with a new theme and more than 카지노사이트luckclub 400 games to choose from. The site focuses